
This article is published on my personal website. Original link: Nuxt Learning Journey 1
Introduction
In the era of AI, being a simple “UI slicer” or having only basic knowledge of frontend engineering is no longer a high-value skill. To avoid being left behind by the rapidly advancing wheels of technology, I’ve decided to learn full-stack development while I’m still young. Since there are relatively few comprehensive Nuxt tutorials in Chinese, I’ve started this series to document my learning and help others avoid common pitfalls.
Installing Nuxt
I am using WebStorm to create the project directly. For beginners, convenience and avoiding initial setup errors should be the top priorities. Of course, creating a project with other IDEs is also simple. The following command creates a project using the latest version of Nuxt:
|
|
The subsequent process is the same regardless of the IDE. Nuxt will start an interactive configuration flow. Once completed, you can start the development server with npm run dev.
|
|
And just like that, our first Nuxt project is up and running!

Convention Over Configuration
A key feature of Nuxt is Convention Over Configuration. In theory, we don’t need to write any configuration files; Nuxt works according to predefined conventions. For example, we don’t need to configure routes manually. By simply creating files in the pages directory, Nuxt automatically recognizes them and creates the corresponding routes.
Let’s try adding a login page:
Creating Pages
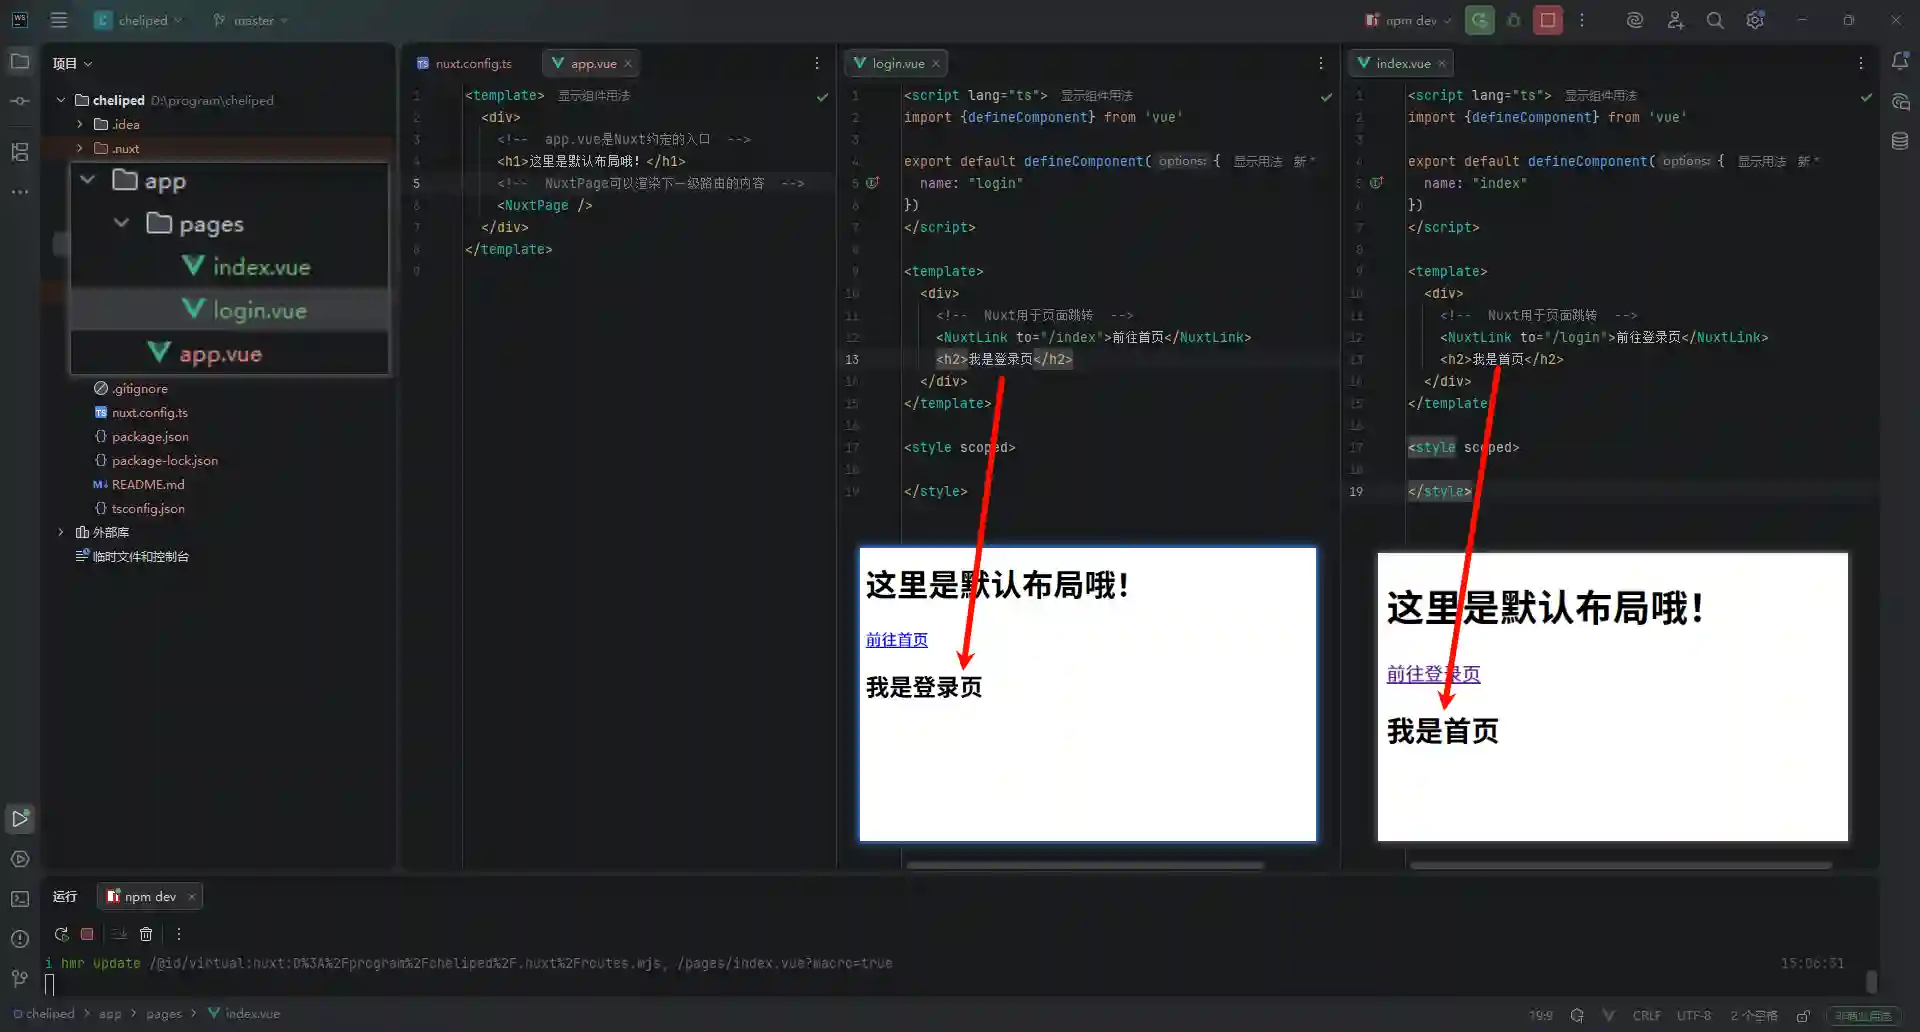
First, we create a pages directory inside the app directory. Create app/pages/index.vue and app/pages/login.vue, then add the relevant content. At this point, if we delete app.vue, Nuxt will automatically render index.vue as the homepage.
|
|
Default Layout
So, what is app.vue? It is our default layout file, effectively the parent component for all pages. While deleting it lets Nuxt render index.vue by convention, let’s keep it and write some layout code:
|
|
If Nuxt finds app.vue, it will use it to wrap and render index.vue as the homepage. Our page and project structure now look like this:
Creating a Web API
Nuxt’s network interfaces are also convention-based and written in JavaScript, which is very friendly for frontend developers. Create a server directory in the project root (note: not inside the app directory), then create a server/api/hello.ts file. Nuxt will automatically create the /api/hello endpoint.
Let’s write a simple API to calculate the sum of two numbers:
|
|
Using the API in the Frontend
Let’s try calling this API in app/pages/index.vue. This code might look confusing at first glance, but I will explain it in parts below.
|
|
Let’s look at the server-side logic first:
|
|
In Nuxt, the beforeCreate and created lifecycles are run on the server. We can pre-assemble the page on the server, much like PHP.
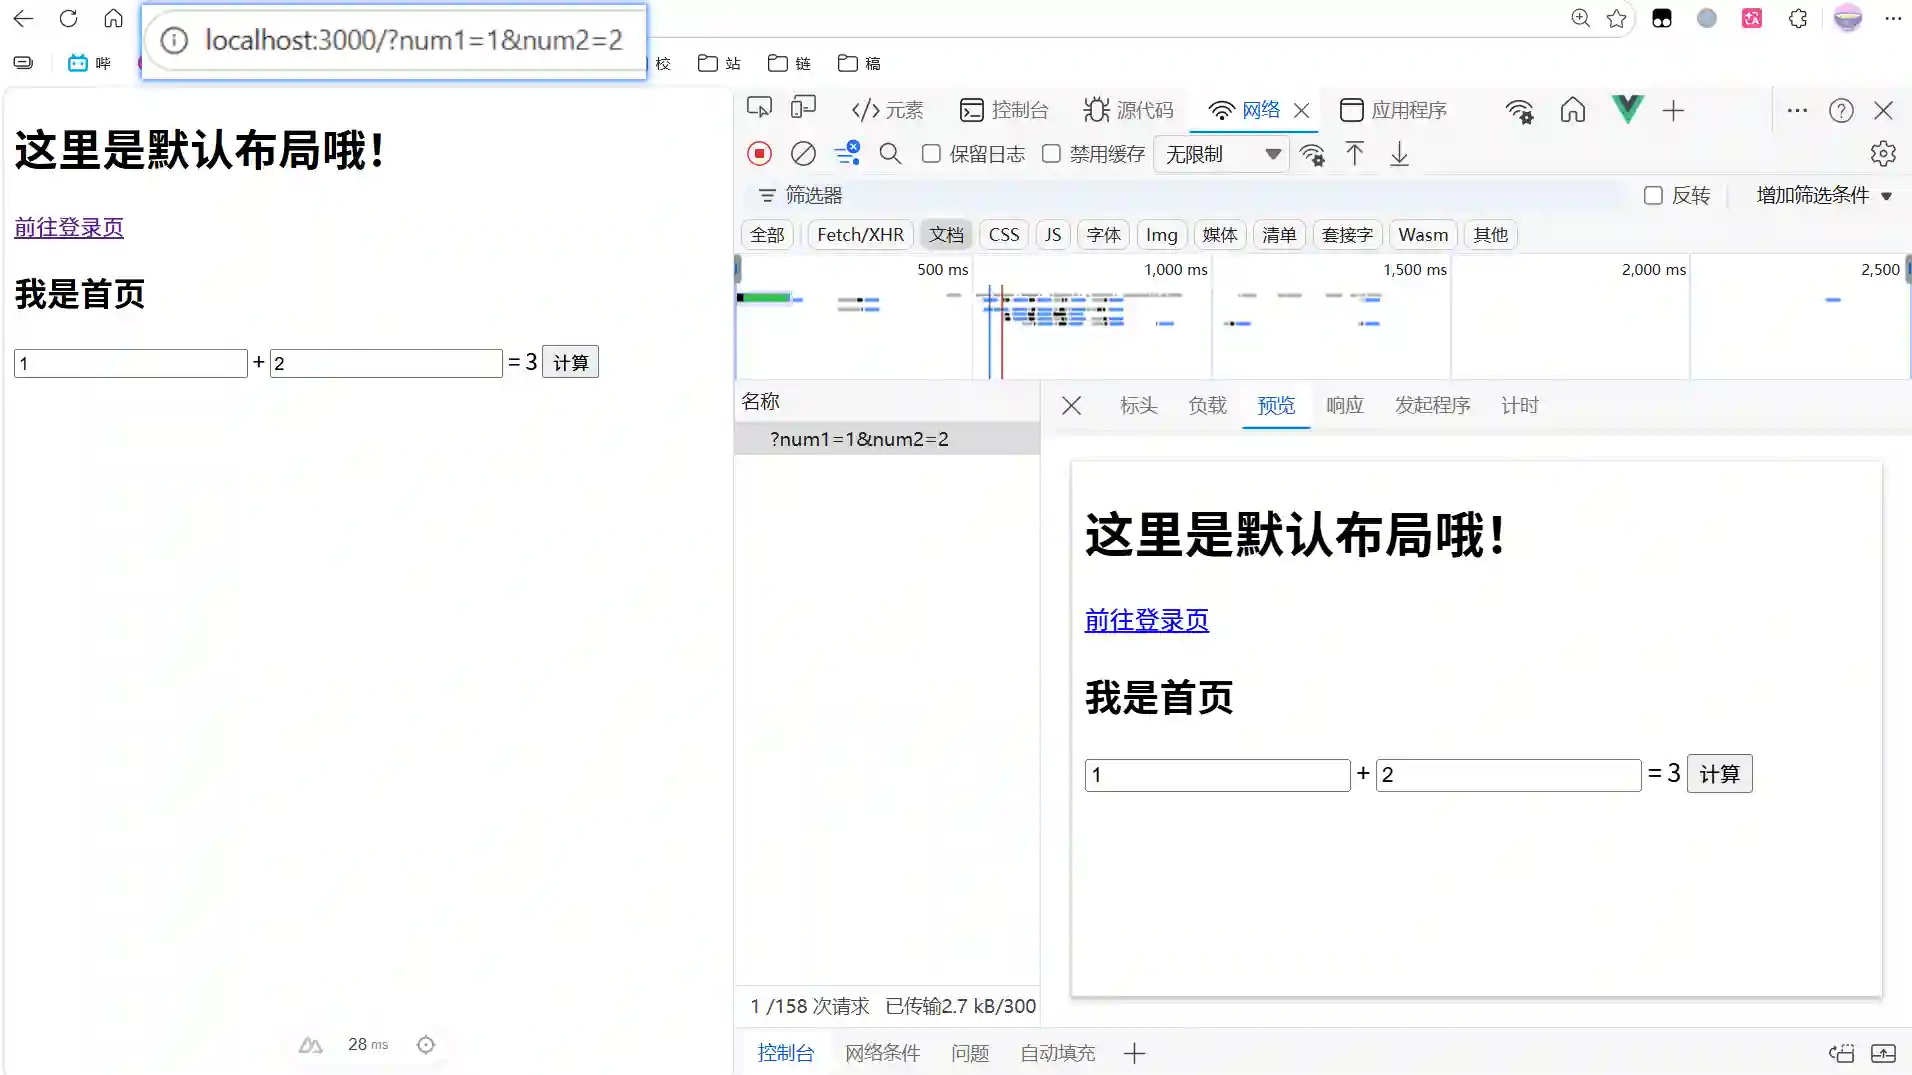
As you can see, when we visit the page with parameters, the server returns the page with the result already calculated, unlike a traditional SPA that fetches an empty page and then fills in the data.
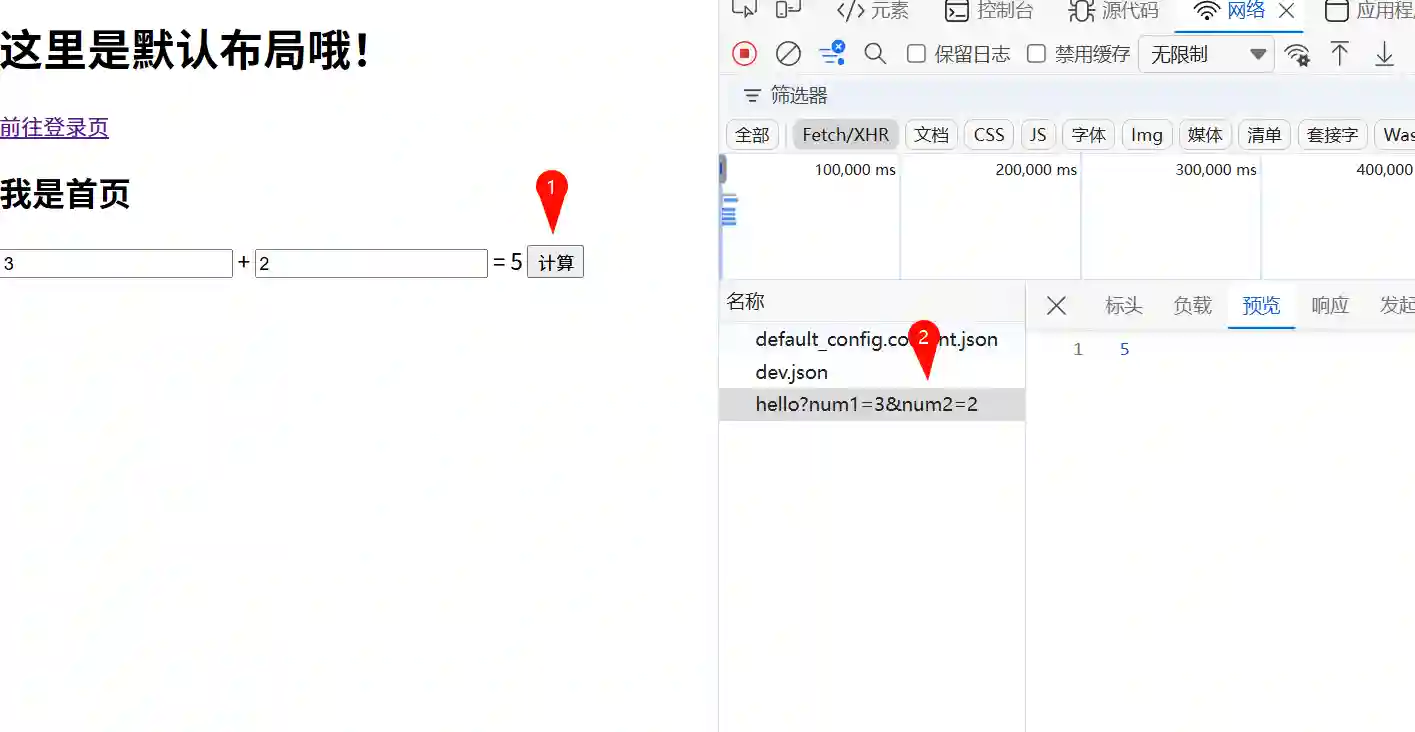
Now, let’s look at the browser-side code:
|
|
This is no different from an SPA. Binding this method to a button triggers a network request directly from the browser.
Summary
Today, we set up and experienced Nuxt for the first time. We created two pages and one API, using them on both the frontend and backend. We’ve caught a glimpse of Nuxt’s powerful server-side rendering capabilities and its seamless connection between the frontend and backend.