
Original article: How to add comments to Hugo blog
Foreword: This article continues the previous article and talks about how to add a comment system to your blog. Read the previous article
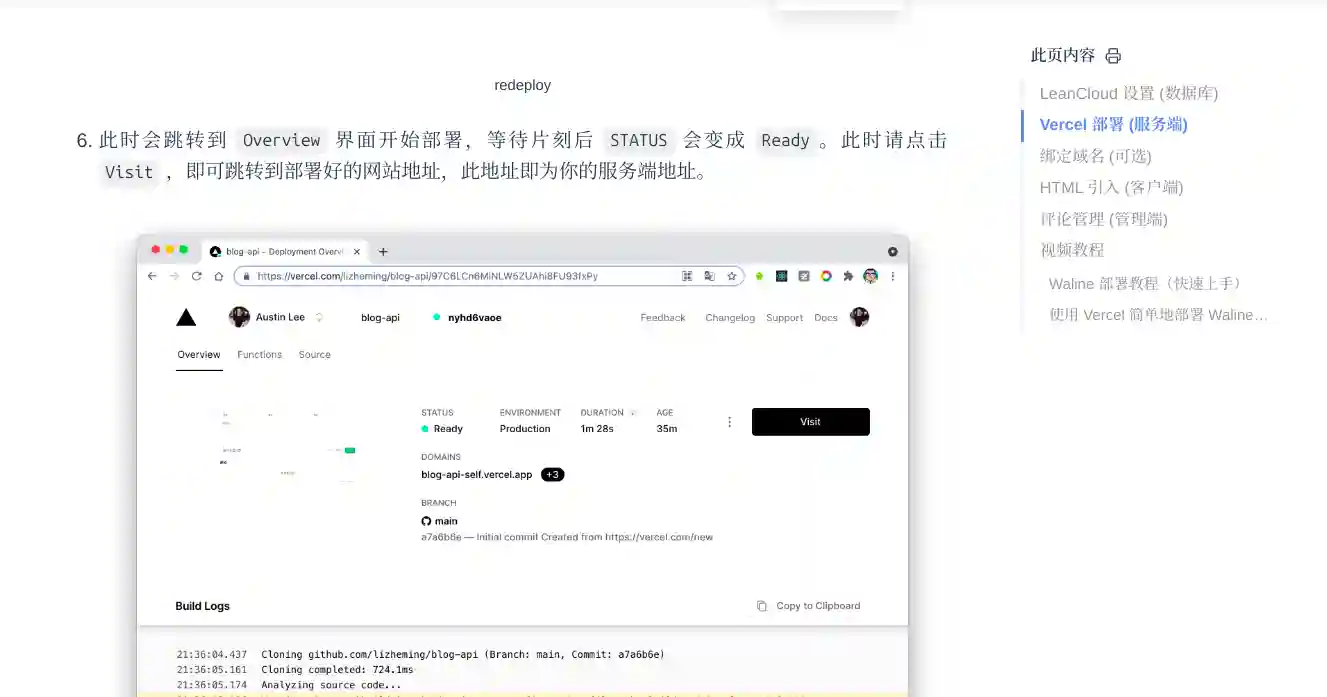
Deploy waline
This part is introduced in detail on the waline official website. We only need to do Vercel deployment (server). Friends who have purchased domain names can do one more step. After completing the deployment, you can return to this article to continue configuration. Click to go to waline tutorial
If you have difficulty accessing vercel, please use magic Internet.
Deploy hugo
We assume that you have configured hugo completely according to the tutorial and have not used other hugo themes.
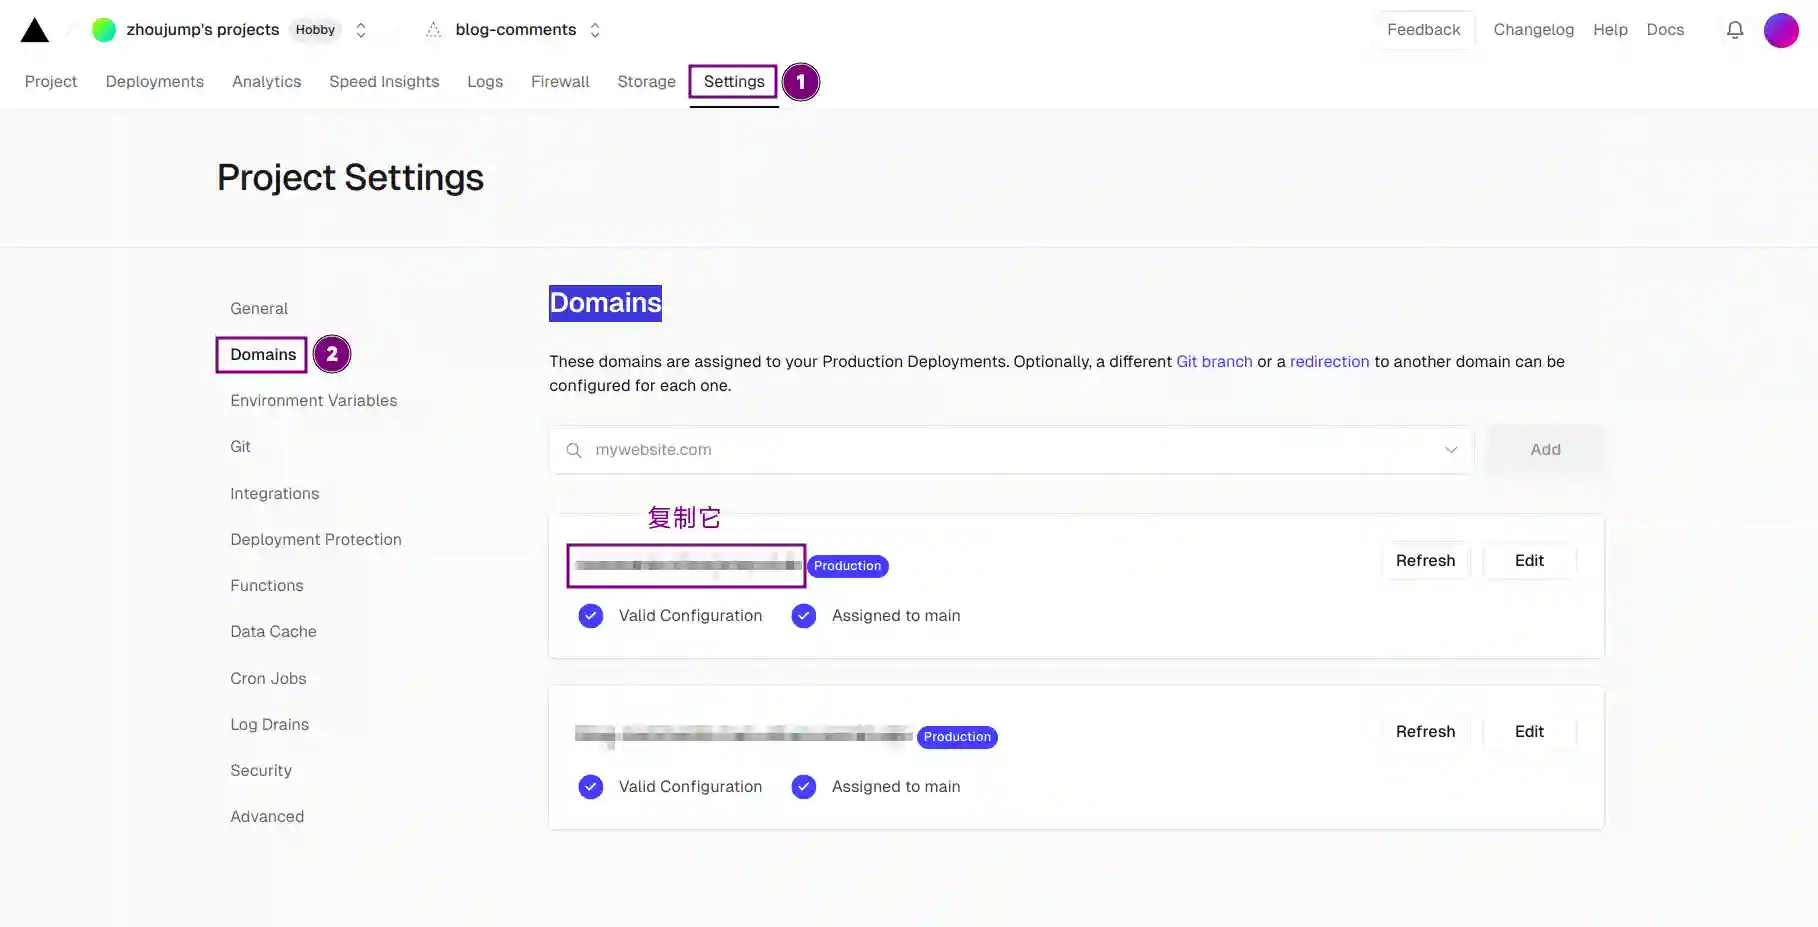
Enter the deployed vercel project and select Settings>Domains to go to the domain name management interface and copy a domain name for backup.
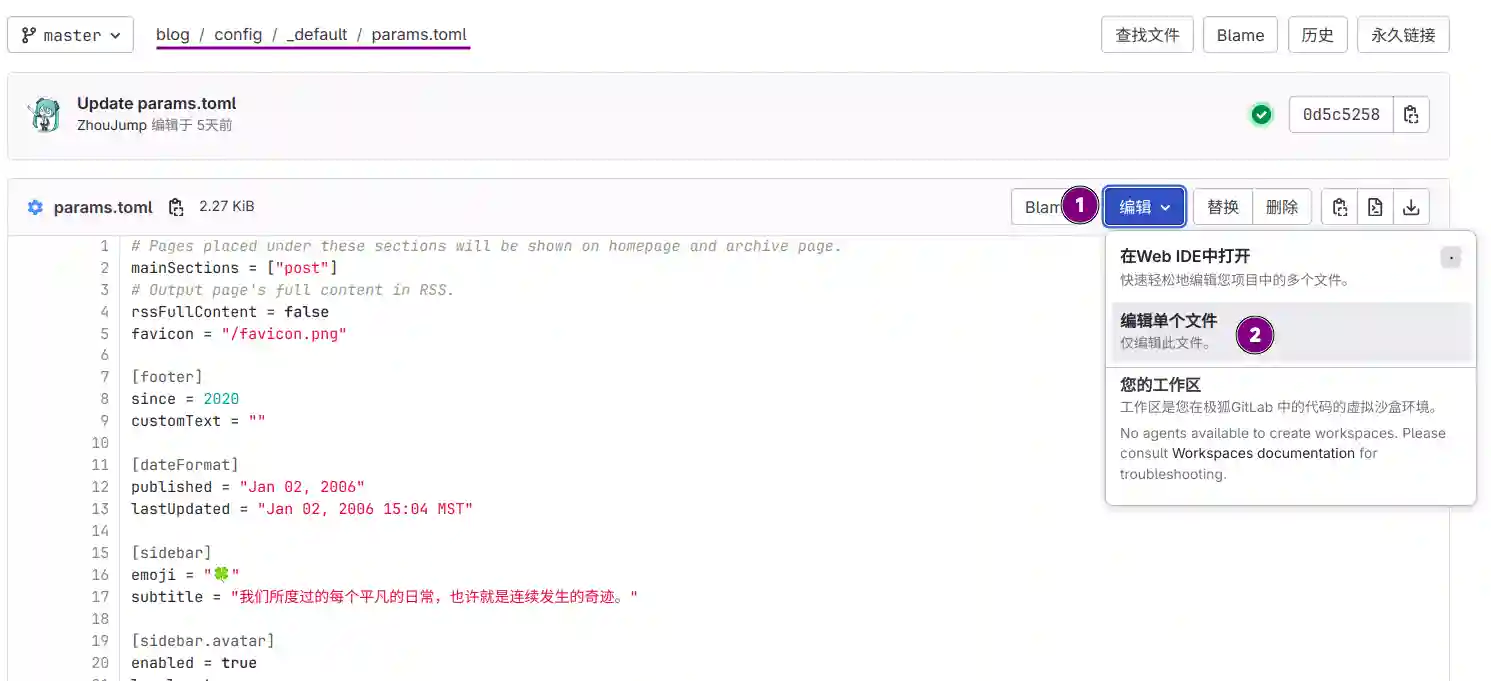
Go to gitlab, find the config/_default/params.toml file, and edit the code starting from line 107
|
|
Then there is the code on line 77
|
|
For more information about the configuration here, please click here
After editing, save it. Wait for the pipeline to run, and then you can see the comment area appear at the end of the article.